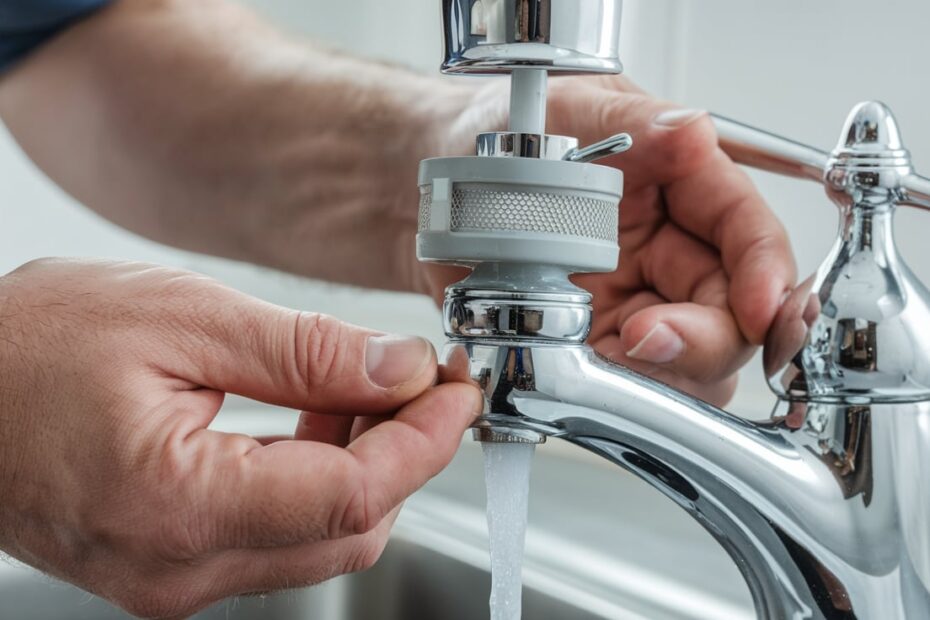
It’s me again, your favorite kitchen faucet expert. Today, I want to share a little secret about keeping your kitchen faucet in tip-top shape. Yes, we’re diving into the exciting world of aerators. They’re small, but mighty, and cleaning them is easier than you think. Unclogging them can also save you from unexpected water bills. Alright, slap on your rubber gloves and let’s get started!
What is an Aerator?
First things first, what on earth is an aerator? Simply put, an aerator is a little device on the tip of your kitchen faucet that mixes air with water. It maintains steady water flow and prevents splashing. See, not just a pretty face, huh?
Why Clean the Aerator?
Here’s the thing: Aerators, over time, collect those pesky minerales. Yup, all those lime deposits and bits of gunk start to build up. A dirty aerator can reduce water pressure and even change the water’s direction. So, cleaning it maintains your faucet’s functionality and water quality.
Tools You’ll Need
Before we begin, gather your tools:
| Tools Needed | Why? |
|---|---|
| Pliers | For unscrewing the aerator |
| Bowl | To soak aerator parts |
| White Vinegar | For mineral deposit removal |
| Old Toothbrush | For scrubbing gunk off |
| Teflon Tape | For resealing |
The Aerator Cleaning Process
Here’s where the fun begins! Follow these steps to clean your aerator:
Step 1: This is Unscrewing Time
It’s adventure time—time to unscrew the aerator. Most aerators can be removed by hand. If yours is stubborn, use pliers but wrap the jaws with a cloth to avoid scratching the faucet.
Tip: Turn the aerator clockwise to avoid Arnold Schwarzenegger-level grip.
Step 2: Time to Disassemble
Got it? Awesome. Now, carefully disassemble the aerator. You’ll usually find several parts: a housing, a metal screen, and sometimes a mixer. Make a mental note of how they fit together.
Step 3: Soak Those Parts!
Next, fill your bowl with white vinegar. Let the disassembled aerator parts soak for about 30 minutes. Vinegar eats away the minerals without damaging the aerator. Nature’s magic at its finest!
Table: Soaking Time
| Part | Soaking Time |
|---|---|
| Metal Screen | 30 mins |
| Housing | 30 mins |
| Mixer | 30 mins |
Step 4: Scrub-a-Dub-Dub
After their vinegar bath, grab your trusty old toothbrush. Gently scrub each part to remove any leftover deposits. Pay attention to the screen since it catches most of the gunk.
Step 5: Reassemble and Reattach
Reassemble the parts in reverse order of disassembly. Use that mental picture we took earlier! Screw it back onto the faucet, hand-tightening it at first. Test for leaks by turning the water back on. If it leaks, add a bit of teflon tape, and tightly screw it again.
When Should You Clean the Aerator?
Ah, the classic question: how often should this happen? I hear ya. Here’s a good rule of thumb: clean the aerator every 6 months. If you notice changes in water pressure or flow, it’s time to clean it sooner. Pro tip: do it quarterly if your area has hard water.
Benefits of Regularly Cleaning
- Increases Water Pressure: Stop shouting while rinsing your veggies.
- Extends Faucet’s Life: Avoid costly repairs by taking care of the small things.
- Better Water Flow: No more awkwardly angled spouts.
- Improves Water Quality: Keep those yucky bits at bay, ensuring clean water.
Common Problems and Quick Fixes
Sometimes things go south. Here’s what you might encounter:
- Faucet Drips After Reassembly: Make sure parts are seated properly. Apply a bit more teflon tape.
- Parts Stuck with Minerals: Soak longer or use a 50/50 vinegar and water solution.
- Lost Aerator Parts: Most hardware stores carry replacements.
Eco-Friendly Cleaning Alternatives
Concerned about the environment? I get it. While vinegar’s already eco-friendly, lemon juice can be an alternative. It’s equally effective and leaves a citrusy scent.
Frequently Asked Questions
- Can I use baking soda instead of vinegar?
- Certainly! A paste of baking soda and water can work wonders. Then rinse thoroughly.
- What if my aerator doesn’t unscrew?
- Stubborn aerators may need a bit of WD-40. Spray gently, wait, then retry.
- Are all aerators the same size?
- Nope! Aerators come in various sizes. Bring yours with you for proper fitting when buying a replacement.
Conclusion
Congratulations, you now know how to clean an aerator! It’s satisfying, seeing clear water flow back at you, isn’t it? Regularly cleaning your aerator doesn’t just groom your faucet but also gives you peace of mind with better water efficiency. Plus, you end up learning a bit more about your fixtures, which is always a win.
Whether you’re using it in a 1950s retro kitchen or a modern culinary paradise, your faucet deserves a little TLC. So, go ahead, unleash your inner Mr. (or Ms.) Fix-It and tackle that aerator!
Happy Cleaning! 🌟
